Showing posts with label Oracle ASM. Show all posts

Tuesday, 26 February 2013

Creating ASM disks using udev in RHEL 6.2


For RHEL6 or Oracle Linux 6, Oracle will only provide ASMLib software and updates when configured Unbreakable Enterprise Kernel (UEK). Oracle will not provide ASMLib packages for kernels distributed by Red Hat as part of RHEL 6 or the Red Hat compatible kernel in Oracle Linux 6. ASMLib updates will be delivered via Unbreakable Linux Network(ULN) which is available to customers with Oracle Linux support. ULN works with both Oracle Linux or Red Hat Linux installations, but ASMlib usage will require replacing any Red Hat kernel with UEK

Therefore use Linux udev to create ASM disk in RHEL 6.2

Steps to create ASM disk using udev

1. Partition the given LUN using fdisk or parted. In our example we have created multiple partition on a single LUN.

Disk /dev/sda: 61.4 GB, 61440262144 bytes
64 heads, 32 sectors/track, 58594 cylinders
Units = cylinders of 2048 * 512 = 1048576 bytes
Sector size (logical/physical): 512 bytes / 512 bytes
I/O size (minimum/optimal): 512 bytes / 512 bytes
Disk identifier: 0x000b7104

   Device Boot      Start         End      Blocks   Id  System
/dev/sda1               1       10241    10486768   83  Linux
/dev/sda2           10242       20482    10486784   83  Linux


2. The device attributes used in the udev rules template are found by running the following
command on each device (here as an example, /dev/sda) and substituting the corresponding
values in the example below:

[root@coltdb01 ~]# scsi_id --page=0x83 --whitelisted --device=/dev/sda
3600c0ff000d7daf2c0588a5001000000

3. With this information, you can isolate the disk devices to be used by ASM to their own
directory (/dev/oracleasm/disks), and automatically change their ownership and access permission so that ASM can read them. Create a new file, /etc/udev/rules.d/99-asm.rules, with contents similar to the following


If you have multiple partitions on a single LUN, you can mention as below

vi 99-asm.rules

# What: oracle database: devices to be used by ASM
## Important: each rule must either be a single line or extend to multiple lines with backslashes.

KERNEL=="sda1", PROGRAM=="scsi_id --page=0x83 --whitelisted --device=/dev/%k", \
RESULT=="3600c0ff000d7daf2c0588a5001000000", \
SYMLINK+="oracleasm/disks/DSK1", OWNER="oracle", GROUP="dba", MODE="0660"

KERNEL=="sda2", PROGRAM=="scsi_id --page=0x83 --whitelisted --device=/dev/%k", \
RESULT=="3600c0ff000d7daf2c0588a5001000000", \
SYMLINK+="oracleasm/disks/DSK2", OWNER="oracle", GROUP="dba", MODE="0660"

If you have single partition on each LUN, you can mention as follow

vi 99-asm.rules

# What: oracle database: devices to be used by ASM
## Important: each rule must either be a single line or extend to multiple lines with backslashes.

KERNEL=="sd*", PROGRAM=="scsi_id --page=0x83 --whitelisted --device=/dev/%k", \
RESULT=="3600605b00162840001e285f91316df21", \
SYMLINK+="oracleasm/disks/DSK1", OWNER="oracle", GROUP="dba", MODE="0660"
KERNEL=="sd*", PROGRAM=="scsi_id --page=0x83 --whitelisted --device=/dev/%k", \
RESULT=="360080e50001c2c8600001a254eeb7a3d", \
SYMLINK+="oracleasm/disks/DSK2", OWNER="oracle", GROUP="dba", MODE="0660"

These rules will take effect after the next reboot.

4. You can see the disks created on node under /dev/oracleasm/disks

[root@coltdb01 disks]# cd /dev/oracleasm/disks
[root@coltdb01 disks]# ls -tlr
total 0
lrwxrwxrwx 1 root root 10 Feb 26 16:36 DSK2 -> ../../sda2
lrwxrwxrwx 1 root root 10 Feb 26 16:36 DSK1 -> ../../sda1

5. The disks created using udev are visible in the installation once you change your "Disk Discovery Path"


6. Occasionally, when reusing a LUN, ASM may detect a previous disk header and refuse to
reuse the disk. If that is the case, clear the header by writing 25 MB of nulls, and repartition
the LUN. For example:

# dd if=/dev/zero of=/dev/oracleasm/disks/DSK1 bs=1M count=25


Thursday, 23 August 2012

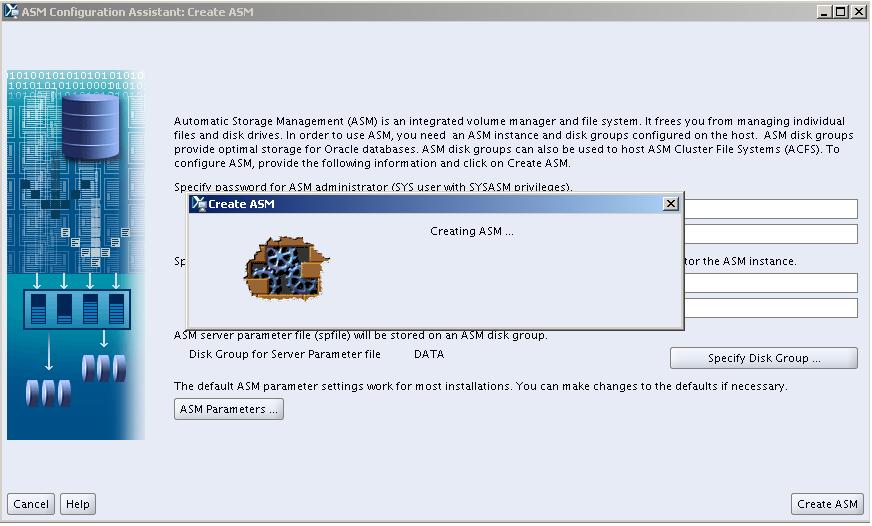
"Oracle Grid Infrastructure is not configured properly. ASMCA needs Oracle Grid Infrastructure to configure ASM" error while creating ASM instance using ASMCA


While creating a ASM instance for standalone server using "asmca", we received the following error.


Intially the Oracle Grid Infrastructure was installed using following option "Install Oracle Grid Infrastructure software Only"

Solution

Execute the "root.sh" again as root user. "root.sh" can be found on grid home.

------------------------
[root@coltdb08 grid]# ./opt/11.2.0/grid/root.sh
Performing root user operation for Oracle 11g

The following environment variables are set as:
    ORACLE_OWNER= oracle
    ORACLE_HOME=  /opt/11.2.0/grid

Enter the full pathname of the local bin directory: [/usr/local/bin]:
The contents of "dbhome" have not changed. No need to overwrite.
The contents of "oraenv" have not changed. No need to overwrite.
The contents of "coraenv" have not changed. No need to overwrite.

Entries will be added to the /etc/oratab file as needed by
Database Configuration Assistant when a database is created
Finished running generic part of root script.
Now product-specific root actions will be performed.

To configure Grid Infrastructure for a Stand-Alone Server run the following command as the root user:
/opt/11.2.0/grid/perl/bin/perl -I/opt/11.2.0/grid/perl/lib -I/opt/11.2.0/grid/crs/install /opt/11.2.0/grid/crs/install/roothas.pl


To configure Grid Infrastructure for a Cluster execute the following command:
/opt/11.2.0/grid/crs/config/config.sh
This command launches the Grid Infrastructure Configuration Wizard. The wizard also supports silent operation, and the parameters can be passed through the response file that is available in the installation media.

---------------------

You can see there is separate script for creating Grid Infrastructure for stand-alone server. Execute the script as root user

--------------------
[root@coltdb08 grid]# /opt/11.2.0/grid/perl/bin/perl -I/opt/11.2.0/grid/perl/lib -I/opt/11.2.0/grid/crs/install /opt/11.2.0/grid/crs/install/roothas.pl
Using configuration parameter file: /opt/11.2.0/grid/crs/install/crsconfig_params
Creating trace directory
User ignored Prerequisites during installation
LOCAL ADD MODE
Creating OCR keys for user 'oracle', privgrp 'oinstall'..
Operation successful.
LOCAL ONLY MODE
Successfully accumulated necessary OCR keys.
Creating OCR keys for user 'root', privgrp 'root'..
Operation successful.
CRS-4664: Node coltdb08 successfully pinned.
Adding Clusterware entries to inittab

coltdb08     2012/08/23 16:56:53     /opt/11.2.0/grid/cdata/coltdb08/backup_20120823_165653.olr
Successfully configured Oracle Grid Infrastructure for a Standalone Server
------------


Now try to create the ASM instance using "asmca", it will successfully create the ASM instance.


Friday, 29 June 2012

Steps To Migrate a Database From Non-ASM to ASM


You can use these steps to migrate a NON-ASM database to ASM database in Oracle 11gR2.

Prerequisite - ASM instance should be created and up and running. Please refer my previous article to create a ASM instance

1) Check the database version and status

   SQL> select INSTANCE_NAME,VERSION,DATABASE_STATUS from v$instance;

    INSTANCE_NAME    VERSION           DATABASE_STATUS
    ---------------- ----------------- -----------------
    learndb          11.2.0.3.0        ACTIVE

2) We should be able to check the ASM disk available from the instance which we created earlier

   SQL> select NAME,STATE,TOTAL_MB,PATH from v$asm_disk;
   NAME                           STATE      TOTAL_MB PATH
   ------------------------------ -------- ---------- ----------
   DISK1                          NORMAL         4777 ORCL:DISK1


Migrating the SPFILE from Non-asm to ASM


1) If you are using a spfile, take a backup of spfile using rman to restore it to ASM disk

   RMAN>BACKUP AS BACKUPSET SPFILE;

2) Now shutdown the database and start it in Mount stage
   SQL> Shutdown immediate

   SQL> STARTUP MOUNT;

3) Now restore the spfile from the backup to ASM disk as below

  RMAN>RESTORE SPFILE TO '+DATA/spfilelearndb.ora';

4) You can see, still the parameter "spfile" is pointing to file system instead of ASM disk

   SQL> show parameter spfile

    NAME                                 TYPE        VALUE
    ------------------------------------ ----------- ------------------------------
    spfile                               string      /opt/oracle/product/11.2.0/dbh
                                                        ome_1/dbs/spfilelearndb.ora
5) Shutdowm the instance

    SQL> shutdown immediate

6) Delete "spfile<sid>.ora and init<sid>.ora from the $ORACLE_HOME/dbs directory and create a new init<sid>.ora with the following line of content and start the instance,

    vi initlearndb.ora
   SPFILE='+DATA/spfilelearndb.ora'

   SQL> Startup (  first it will search for spfile<sid>.ora which we deleted and next it will look for      init<sid>.ora which we have moified with the above content  )

   SQL> show parameter spfile

    NAME                                 TYPE        VALUE
   ------------------------------------ ----------- ------------------------------
   spfile                               string      +DATA/spfilelearndb.ora


Migrating Control files from Non-ASM to ASM


1) These are the current control files in non-asm

SQL>show parameter contol_files
         control_files                        string      /u01/data/learndb/control01.ctl,
                                                                 /u01/data/learndb/control02.ctl

2) Start the instance in nomount state

SQL> startup nomount

3) You can move these control files to ASM using RMAN

    [oracle@coltdb04 ~]$ rman target /

    Recovery Manager: Release 11.2.0.3.0 - Production on Fri Jun 29 03:04:39 2012

    Copyright (c) 1982, 2011, Oracle and/or its affiliates.  All rights reserved.

    connected to target database: LEARNDB (not mounted)


    RMAN>restore controlfile to '+DATA' from '/u01/data/learndb/control01.ctl';


4) You can check whether the control file are created

   ASMCMD> find -t CONTROLFILE +DATA *
   WARNING:option 't' is deprecated for 'find'
   please use 'type'

   +DATA/LEARNDB/CONTROLFILE/current.256.787200593

5) Update the spfile with new control file location

   SQL> alter system set control_files='+DATA/LEARNDB/CONTROLFILE/current.256.787200593' scope=spfile;

6) Now shutdown the instance and startup in mount stage and check for the control file location
 
   SQL> shutdown immediate

   SQL> startup mount

   SQL> show parameter control_files

       NAME                                 TYPE        VALUE
     ------------------------------------ ----------- ------------------------------
     control_files                        string      +DATA/learndb/controlfile/curr
                                                      ent.256.787200593


Migrating the Datafiles from Non-ASM to ASM

1) Keep the database is in mount stage

2) Use RMAN "BACKUP AS COPY" method to migrate the datafiles from filesystem to ASM

   [oracle@coltdb04 ~]$ rman target /

   Recovery Manager: Release 11.2.0.3.0 - Production on Fri Jun 29 03:00:40 2012

   Copyright (c) 1982, 2011, Oracle and/or its affiliates.  All rights reserved.

   connected to target database: LEARNDB (DBID=3704858930, not open)
                                           

   RMAN> BACKUP AS COPY DATABASE FORMAT '+DATA';

3)  Switch the database to the copy created using the following RMAN command

   RMAN> SWITCH DATABASE TO COPY;

   datafile 1 switched to datafile copy "+DATA/learndb/datafile/system.258.787201633"
   datafile 2 switched to datafile copy "+DATA/learndb/datafile/sysaux.257.787201553"
   datafile 3 switched to datafile copy "+DATA/learndb/datafile/undotbs1.259.787201713"
   datafile 4 switched to datafile copy "+DATA/learndb/datafile/users.261.787201725"

4) Migrate the tempfile to ASM using RMAN

   RMAN> run
   2> {
   3> set newname for tempfile '/u01/data/learndb/temp01.dbf' to '+DATA';
   4> switch tempfile all;
   5> }

   executing command: SET NEWNAME

   using target database control file instead of recovery catalog

   renamed tempfile 1 to +DATA in control file

5) Now open the Database

   RMAN> ALTER DATABASE OPEN;

   database opened

6) You can now check the datafiles created in ASM
 
   SQL> select FILE_NAME from dba_data_files;

   FILE_NAME
   --------------------------------------------------------------------------------
   +DATA/learndb/datafile/users.261.787201725
   +DATA/learndb/datafile/undotbs1.259.787201713
   +DATA/learndb/datafile/sysaux.257.787201553
   +DATA/learndb/datafile/system.258.787201633


Migrating the Redo log files from Non-ASM to ASM

1) Identify the currently available redo log files using the following command

   SQL> SELECT a.group#, b.member, a.status FROM v$log a, v$logfile b WHERE a.group#=b.group#;

    GROUP#           MEMBER                STATUS
   ----------       ---------              -----------
 
        3    /u01/data/learndb/redo03.log INACTIVE

        2    /u01/data/learndb/redo02.log CURRENT

        1    /u01/data/learndb/redo01.log INACTIVE

2) Add the new logfiles to ASM using following command

   ALTER DATABASE ADD LOGFILE MEMBER '+DATA' TO GROUP 1; 
   ALTER DATABASE ADD LOGFILE MEMBER '+DATA' TO GROUP 2;
   ALTER DATABASE ADD LOGFILE MEMBER '+DATA' TO GROUP 3;

3) Now drop the old logfiles, A redo log member can only be dropped after being archived and being in INACTIVE mode. If needed, switch logfile multiple times until the logfile is ready for dropping.
   ALTER DATABASE DROP LOGFILE MEMBER '/u01/data/learndb/redo01.log';
   ALTER SYSTEM SWITCH LOGFILE;
   ALTER DATABASE DROP LOGFILE MEMBER '/u01/data/learndb/redo02.log';
   ALTER SYSTEM SWITCH LOGFILE;
   ALTER DATABASE DROP LOGFILE MEMBER '/u01/data/learndb/redo03.log';

4) You can check the logfiles created now in ASM

     GROUP#           MEMBER                STATUS
   ----------       ---------              -----------
         1    +DATA/learndb/onlinelog/group_1.264.787205393   CURRENT

         2    +DATA/learndb/onlinelog/group_2.265.787205405   INACTIVE

         3    +DATA/learndb/onlinelog/group_3.266.787205417   INACTIVE

Now your database is migrated to ASM

Tuesday, 12 June 2012

Mapping OS device to ASM disk


The best way of mapping OS device -> ASM disk

[root@coltdb01 init.d]# oracleasm querydisk /dev/sdb8
Device "/dev/sdb8" is marked an ASM disk with the label "VOL4"

[root@coltdb01 init.d]# oracleasm querydisk /dev/sdb7
Device "/dev/sdb7" is marked an ASM disk with the label "VOL3"

[root@coltdb01 init.d]# oracleasm querydisk /dev/sdb6
Device "/dev/sdb6" is marked an ASM disk with the label "VOL2"

[root@coltdb01 init.d]# oracleasm querydisk /dev/sdb5
Device "/dev/sdb5" is not marked as an ASM disk